Changing your DNS servers on Windows 10
1. Right click the Start menu, then select 'Network Connections'.

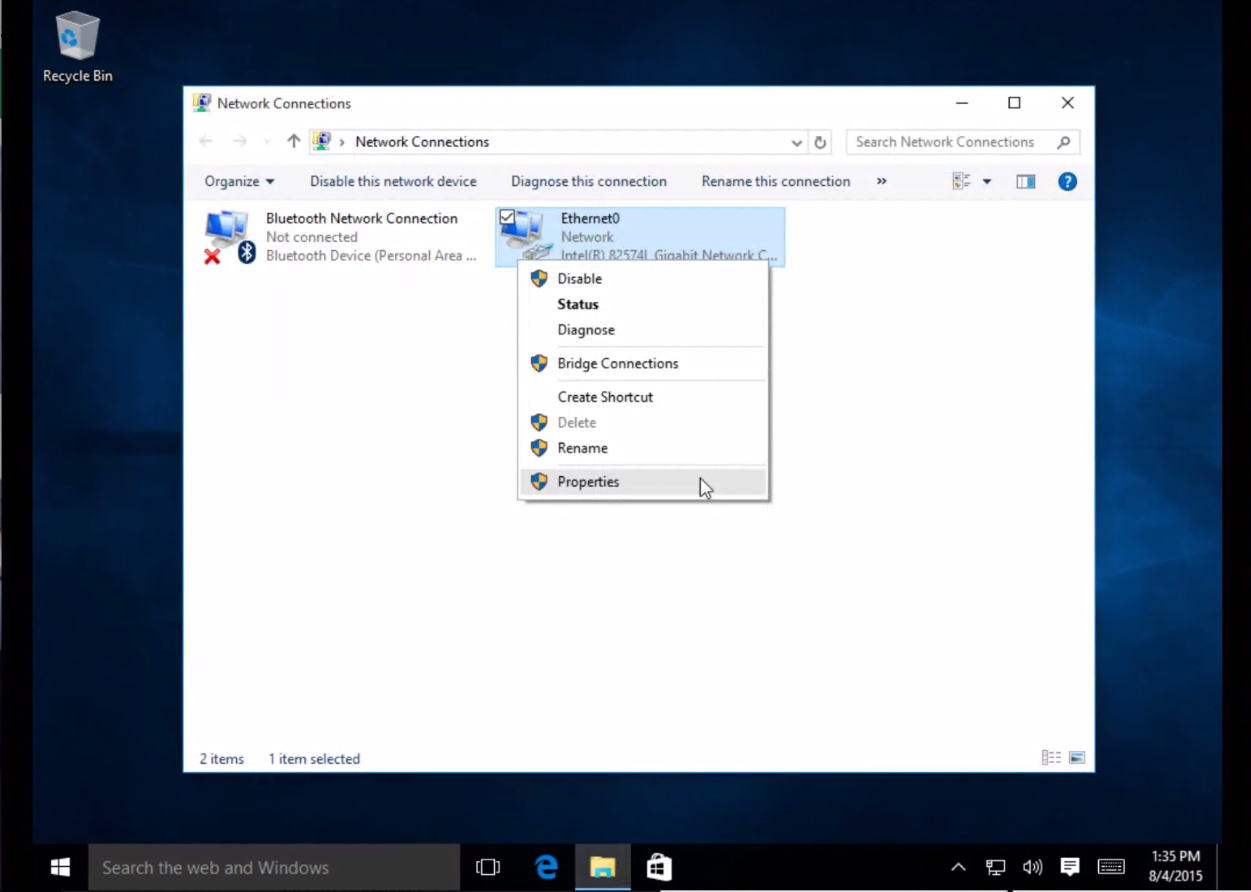
2. Right click on the network connection you're using and select 'Properties'.
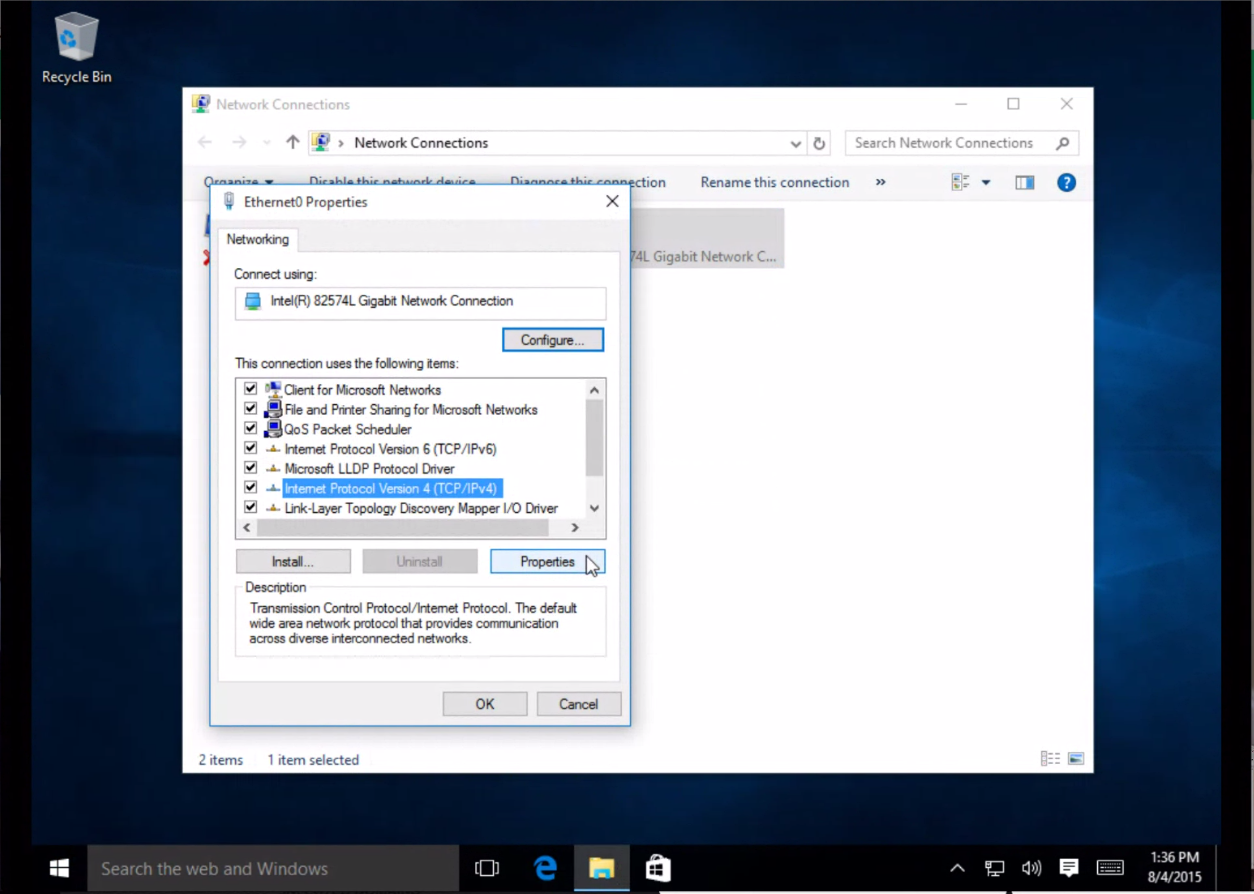
3. Highlight 'Internet Protocol Version 4 (TCP/IPv4)' and click Properties.
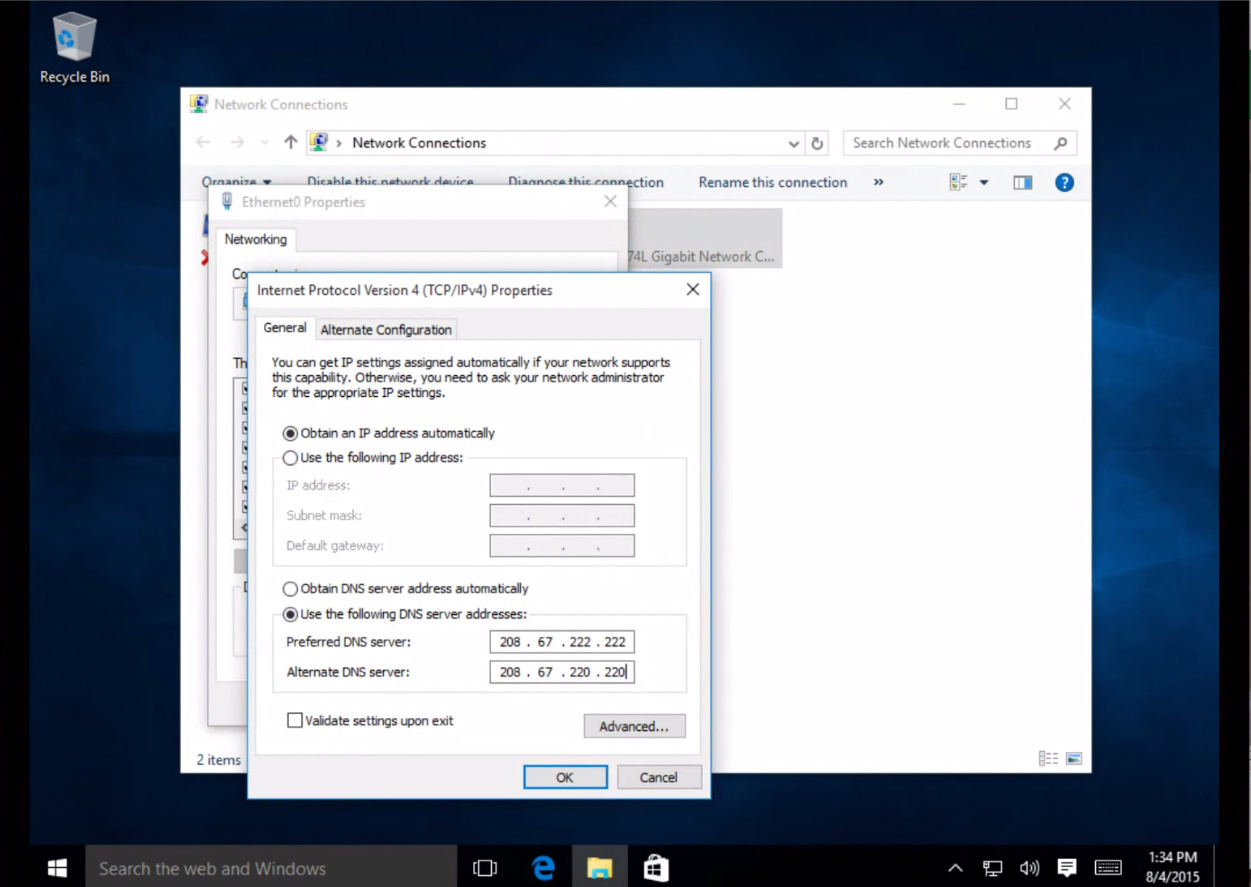
4. Click the radio button 'Use the following DNS server addresses. You can change this to your personal DNS server or to any specific DNS server. For example you can use Google's IPs 8.8.8.8 and 8.8.4.4
5. Click the 'OK' button, then the 'Close' button, then 'Close' again. Finally, close the 'Network Connections' window.
6. Flush your DNS. At this point, we recommend that you flush your DNS resolver cache and web browser caches to ensure that your new DNS configuration settings take immediate effect.